Glass skin. The term has been everywhere since Korean beauty routine popularized it, and it’s become one of the most aspirational skin goals on the internet. Imagine skin so flawlessly smooth, so profoundly hydrated, and so luminously clear that it appears almost transparent, like a pane of freshly polished glass. It’s the ultimate K-beauty ideal: skin that doesn’t just glow, but practically radiates light from within, free from visible texture, pores, or dullness.
But between the filters, the ring lights, and the marketing, it’s easy to lose sight of what glass skin actually means and whether it’s achievable for real people living real lives. The social media fantasy often depicts an unattainable, airbrushed perfection, leading many to believe that glass skin is either a genetic lottery win or the result of expensive cosmetic procedures.
Spoiler: it is achievable. Not the filtered, airbrushed perfection you see on social media, but genuinely luminous, smooth, deeply hydrated skin that reflects light evenly. That’s the real glass skin. And it’s the result of consistent, intelligent skincare focused on two core principles: profound hydration and robust barrier health, not genetics or expensive treatments. It’s a journey towards your skin’s healthiest, most radiant state.
At Glow-Coded, we’re dedicated to cutting through the noise and delivering actionable, science-backed skincare wisdom. We spent six weeks following a dedicated glass skin routine to test its efficacy, meticulously tracking our progress and refining our understanding. This definitive guide distills everything we learned, offering you the clearest path to achieving your own version of glass skin. Prepare to transform your complexion from dull to dazzling, from textured to translucent, and discover the true power of a healthy, glow-coded routine.
What Glass Skin Actually Is: The Science of Luminous Skin
The Korean concept of “yuri pibu,” or “glass skin,” isn’t just a poetic description; it’s a visual manifestation of optimal skin health. It describes skin that embodies five key characteristics, all rooted in the science of hydration and barrier integrity:
- Translucent: So clear and smooth that it appears almost transparent, like a pane of glass. This isn’t about being pale or lacking pigment; it’s about the clarity and evenness of your skin tone and texture.
- Poreless (in appearance): Not actually poreless (everyone has pores), but so smooth, plump, and hydrated that pores are nearly invisible to the naked eye.
- Deeply Hydrated: Not oily. Not greasy. Not shiny from product. This is hydration from within, a natural luminosity that emanates from well-nourished cells.
- Even-toned: No redness, no blotchiness, no visible hyperpigmentation. An even, uniform canvas that allows light to reflect without interruption.
- Bouncy (“Chok Chok”): When you gently press the skin, it springs back immediately, indicating excellent elasticity and a robust moisture content. This is the hallmark of truly healthy, youthful skin.
Glass skin is NOT:
- Just applying a dewy foundation or highlighter. While makeup can enhance a glow, glass skin is about the underlying complexion.
- Piling on shiny products until your face is reflective. This often leads to a greasy look, not a healthy glow.
- A genetic gift reserved for Korean celebrities. While genetics play a role in baseline skin type, the appearance of glass skin is largely cultivated.
- Achievable overnight. It’s the cumulative result of a hydration-focused skincare routine practiced consistently over weeks and months.
The Science Behind the Glow: Hydration, Light Reflection, and Barrier Integrity
Every element of glass skin comes back to the fundamental health of your skin’s outermost layer, the stratum corneum, and its ability to retain moisture.
Stratum Corneum Hydration: The stratum corneum, often described as a “brick and mortar” structure, is composed of dead skin cells (corneocytes) embedded in a lipid matrix. When these corneocytes are adequately hydrated, they plump up and lie flat, creating a smooth, uniform surface. This smoothness is crucial for glass skin. Dehydrated corneocytes, conversely, shrivel and become irregular, leading to a rough, dull surface.
Light Reflection: Imagine shining a light on two surfaces: a perfectly smooth mirror and a crumpled piece of foil. The mirror reflects light evenly and directly (specular reflection), creating a clear, bright image. The crumpled foil scatters light in many directions (diffuse reflection), making it appear dull and uneven. Well-hydrated, smooth skin acts like the mirror. The even surface allows light to reflect uniformly, creating that coveted “glassy” sheen. When skin is dehydrated or has an uneven texture (due to dead skin cell buildup, inflammation, or compromised barrier), light is scattered, resulting in a dull, lackluster appearance. The translucency of glass skin is also linked to this even light reflection; when light penetrates and reflects uniformly, the skin appears clearer and more luminous.
Barrier Integrity: The skin barrier (epidermal barrier) is your body’s first line of defense. Comprising the stratum corneum and its lipid matrix, its primary function is to prevent transepidermal water loss (TEWL) and protect against environmental aggressors, irritants, and microbes. A healthy, intact skin barrier is paramount for glass skin because:
- Moisture Retention: A strong barrier effectively seals in the hydration delivered by your skincare products, preventing water from evaporating too quickly. Without a healthy barrier, even the most hydrating products will struggle to keep your skin plump.
- Smoothness and Resilience: A compromised barrier leads to dryness, flakiness, inflammation, and increased sensitivity, all of which detract from the smooth, even texture required for glass skin. A robust barrier contributes to the “bouncy” quality of healthy skin, as it indicates good elasticity and water content.
- Reduced Inflammation: A strong barrier is less susceptible to irritation and inflammation, which can manifest as redness, breakouts, and hyperpigmentation – all enemies of an even, translucent complexion.
This is why the glass skin routine is so heavily focused on layers of hydrating products and gentle, barrier-supporting ingredients rather than heavy coverage or strong, potentially irritating actives. It’s about nurturing your skin’s natural ability to glow.
Is Glass Skin Achievable for Everyone? An Honest Look
The quest for glass skin often comes with the unspoken expectation of achieving perfection. So, let’s be honest: can everyone achieve glass skin? The answer is nuanced.
The Realistic Truth: Genetics Play a Role
While the glass skin ideal is universal, the degree to which you can achieve it is influenced by your individual genetics and inherent skin characteristics:
- Pore Size: True pore size is genetically determined. While you can significantly minimize the appearance of pores through hydration and exfoliation, you cannot physically shrink them. If you naturally have larger pores, your “poreless” glass skin might still show some subtle texture upon very close inspection, but it will be a vast improvement.
- Skin Texture: Some people naturally have finer skin texture, while others may have more visible texture due to factors like collagen density, elasticity, or past acne scarring. While skincare can dramatically improve surface smoothness, it cannot erase deep scars or fundamentally alter your skin’s underlying architecture.
- Skin Tone and Pigmentation: Natural skin tone varies widely. Glass skin emphasizes evenness and clarity of tone, not a specific shade. While hyperpigmentation can be addressed, underlying conditions like melasma or persistent redness (e.g., from rosacea) may require more specialized treatments beyond a standard glass skin routine.
- Skin Type and Conditions: Oily skin types might find it easier to achieve a “dewy” look, but need to balance hydration with sebum control. Dry skin types will need richer hydration. Those with chronic conditions like severe acne, eczema, or rosacea will need to prioritize managing these conditions first, as inflammation and irritation are antithetical to glass skin.
What You CAN Achieve and Improve:
Despite genetic predispositions, almost everyone can achieve a significant improvement in their skin’s clarity, luminosity, and overall health, leading to their best possible version of glass skin. Here’s what you absolutely can improve:
- Hydration Levels: This is the most controllable factor. Consistent, layered hydration will plump up skin cells, improve barrier function, and enhance light reflection for a visible glow.
- Skin Barrier Health: With the right products and gentle practices, you can strengthen your skin barrier, reducing sensitivity, dryness, and inflammation. A healthy barrier is the foundation of glass skin.
- Evenness of Tone: Gentle exfoliation, antioxidant serums, and diligent SPF use can significantly reduce hyperpigmentation, redness, and dullness, leading to a more uniform and translucent complexion.
- Surface Smoothness: Removing dead skin cells and ensuring proper hydration will smooth out rough patches and improve overall texture, making pores appear less noticeable.
- “Chok Chok” Bounce: Improved hydration and barrier function will restore elasticity and resilience, giving your skin that satisfying plumpness.
The journey to glass skin is about embracing progress, not chasing an impossible ideal. It’s about nurturing your skin to its healthiest, most radiant state. Your glass skin might not look exactly like a celebrity’s, but it will be your luminous, healthy, and deeply hydrated skin – and that’s a beautiful, achievable goal.
The Glass Skin Routine Step-by-Step: Your Path to Luminous Skin
The glass skin routine is a carefully orchestrated symphony of hydration, gentle exfoliation, and barrier support. It’s less about a specific number of products and more about the types of products, their layering, and consistent application. Each step builds upon the last, creating a cumulative effect that transforms your skin from within.
Step 1: Double Cleanse
WHY it matters for Glass Skin: A perfectly clean canvas is non-negotiable for glass skin. Double cleansing ensures that every trace of makeup, sunscreen, pollution, and excess sebum is thoroughly removed without stripping your skin. This allows subsequent hydrating and active ingredients to penetrate and work effectively, rather than sitting on a layer of impurities. It’s the foundational step that respects your moisture barrier from the very beginning.
Product Types to Look For:
- First Cleanse (Oil-Based):
- What it does: Dissolves oil-based impurities like makeup (even waterproof), sunscreen, and excess sebum. Works on the principle that “like dissolves like.”
- Examples: Cleansing oils, cleansing balms.
- Key Ingredients: Lightweight botanical oils (jojoba, grapeseed, sunflower), emulsifiers (to rinse cleanly).
- Avoid: Heavy mineral oils that can feel occlusive or pore-clogging for some, or formulas that don’t emulsify well.
- Second Cleanse (Water-Based):
- What it does: Removes any remaining residue from the oil cleanser, as well as water-based impurities like sweat, dirt, and dead skin cells.
- Examples: Gentle gel cleansers, cream cleansers, low-pH foaming cleansers.
- Key Ingredients: Mild surfactants, humectants (glycerin), soothing botanicals (centella asiatica, green tea).
- Avoid: Harsh sulfates (SLS/SLES), high-pH formulas that leave your skin feeling “squeaky clean” or tight, as these disrupt the skin barrier.
How to Double Cleanse:
- Oil Cleanse: Dispense 1-2 pumps of oil cleanser or a coin-sized amount of balm onto dry hands. Gently massage onto your dry face for 60 seconds, focusing on areas with makeup or sunscreen. Add a splash of water to your face and continue massaging; the oil will emulsify into a milky texture. This is crucial for rinsing clean.
- Water Cleanse: Rinse thoroughly with lukewarm water. Follow immediately with your water-based cleanser. Lather a small amount with water in your hands, then gently massage onto your damp face for 30-60 seconds. Rinse thoroughly.
- Pat Dry: Gently pat your face dry with a clean, soft towel. Your skin should feel clean, soft, and hydrated, never tight or stripped.
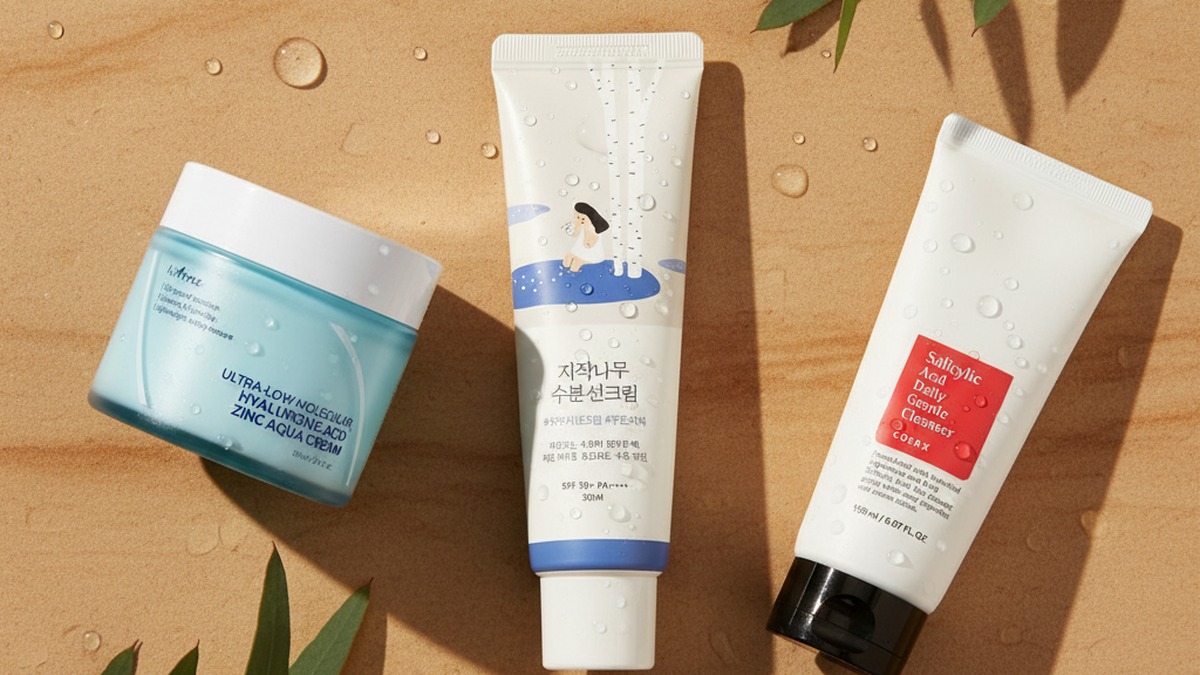
Product Recommendations: For an excellent starting point, consider the Anua Heartleaf Pore Control Cleansing Oil for its lightweight, effective formula. Pair it with a gentle low-pH gel cleanser. For more options, explore our guide to the [/best-double-cleansing-products/].
Step 2: Gentle Exfoliation (1-2x per Week)
WHY it matters for Glass Skin: A smooth, even surface is absolutely essential for light to reflect uniformly, creating that glass-like sheen. Gentle chemical exfoliation removes the buildup of dead skin cells that create texture, dullness, and can make pores appear larger. It also signals skin to regenerate, revealing fresher, brighter skin underneath and improving the absorption of subsequent products.
Product Types to Look For: Focus on chemical exfoliants, as physical scrubs can be too harsh and create micro-tears, damaging the barrier.
- AHAs (Alpha Hydroxy Acids): Glycolic acid, Lactic acid, Mandelic acid. Work on the skin’s surface, breaking down the “glue” that holds dead skin cells together. Excellent for improving texture, tone, and radiance.
- BHAs (Beta Hydroxy Acids): Salicylic acid. Oil-soluble, so it can penetrate into pores to dissolve sebum and dead skin cells. Ideal for those with oily or acne-prone skin, or concerns about blackheads and congested pores.
- PHAs (Poly Hydroxy Acids): Gluconolactone, Lactobionic acid. Larger molecular size than AHAs, making them gentler and less irritating. Suitable for sensitive skin.
How to Exfoliate:
- Frequency: Use a low-concentration exfoliant (e.g., 5-8% AHA or 0.5-2% BHA) 1-2 times per week, in your evening routine, after cleansing.
- Application: Apply to dry skin using a cotton pad or your fingers. Allow it to absorb for a few minutes before moving to the next step.
- Listen to Your Skin: Never over-exfoliate. If you experience redness, stinging, or increased sensitivity, reduce frequency or switch to a gentler formula. On non-exfoliation days, skip this step entirely. Over-exfoliation is a common mistake that destroys the very barrier you’re trying to strengthen and can lead to irritation and inflammation, counteracting the glass skin goal.
Step 3: Hydrating Toner & Essence Layering
WHY it matters for Glass Skin: This is where the magic of “deep hydration” truly begins. Toners and essences are lightweight, water-based formulas designed to infuse the skin with multiple layers of hydration, balance pH after cleansing, and prepare it to better absorb subsequent treatments. They plump up skin cells, improve elasticity, and create a dewy, supple base.
Product Types to Look For:
- Hydrating Toners:
- What it does: Rebalances skin’s pH, provides initial layer of hydration, preps for absorption.
- Key Ingredients: Humectants (hyaluronic acid, glycerin, panthenol, beta-glucan, polyglutamic acid), soothing botanicals (centella asiatica, green tea, heartleaf).
- Avoid: Alcohol, astringent ingredients, strong fragrances.
- Essences:
- What it does: A K-Beauty staple, essences are more concentrated than toners but lighter than serums. They deliver a potent dose of active ingredients in a lightweight, easily absorbed format, targeting specific concerns like brightening, repair, and deep hydration.
- Key Ingredients: Fermented ingredients (galactomyces ferment filtrate, saccharomyces ferment filtrate) for brightening and texture, peptides, antioxidants, additional humectants.
How to Layer Toners & Essences:
- Toner Application: After cleansing (and exfoliating on exfoliation nights), dispense a small amount of hydrating toner into your palms. Gently pat it onto your face, neck, and décolletage.
- Layering (The 7-Skin Method): For maximum hydration, repeat the toner application 3-7 times (see dedicated section below for more detail). Each layer should be thin, and you should wait 10-15 seconds for the previous one to absorb slightly before adding the next. Your skin should feel progressively more plump and bouncy with each layer.
- Essence Application: After your toner layers, dispense 2-3 drops of essence into your palms. Gently press and pat it into your skin until fully absorbed. No cotton pads are necessary – your hands allow for better absorption and less product waste.
Product Recommendations: The Anua Heartleaf 77% Soothing Toner is excellent for this step — lightweight, calming, and layers beautifully. For essences, look for fermented ingredients like the COSRX Advanced Snail 96 Mucin Power Essence (which can also function as a hydrating essence/serum due to its texture and benefits).
Step 4: Serum
WHY it matters for Glass Skin: Serums are concentrated treatments designed to deliver potent active ingredients deep into the skin, targeting specific concerns and amplifying the glass skin effect. They provide an intensive boost of hydration, barrier repair, and brightening, further enhancing clarity and luminosity.
Product Types to Look For:
- Hyaluronic Acid (HA) Serum: The ultimate humectant, drawing moisture from the environment and deeper skin layers to plump up the skin, reduce the appearance of fine lines, and create a dewy finish. Look for multi-molecular weight HA for hydration at different skin depths.
- Niacinamide (Vitamin B3) Serum: A powerhouse ingredient for glass skin. It refines the appearance of pores, strengthens the skin barrier, reduces redness and inflammation, brightens uneven skin tone, and helps regulate oil production.
- Snail Mucin Serum: Known for its incredible hydrating, repairing, and regenerating properties. It contains hyaluronic acid, glycoproteins, and antioxidants, promoting elasticity, soothing irritation, and improving skin texture.
- Vitamin C Serum (stable forms): For brightening hyperpigmentation and providing antioxidant protection, leading to a more even and radiant complexion. Choose stable derivatives like Ascorbyl Glucoside or Tetrahexyldecyl Ascorbate for gentler action.
- Peptide Serums: Support collagen production, improving skin firmness and elasticity, contributing to the “bouncy” quality of glass skin.
How to Apply Serums:
- Damp Skin: Always apply serums to damp skin. The moisture from the previous toner/essence steps gives humectant serums (like HA) something to bind to, enhancing their efficacy.
- Amount: 2-3 drops are usually sufficient.
- Application: Gently press and pat the serum into your skin until absorbed.
- Layering: If using multiple serums, apply from thinnest to thickest consistency. For a detailed guide, refer to our article on [/how-to-layer-serums-the-right-way/].
Product Recommendations: Our top picks include Torriden Dive-In Low Molecular Hyaluronic Acid Serum for pure, multi-depth hydration. For hydration plus repair and elasticity, the COSRX Advanced Snail 96 Mucin Power Essence is a cult favorite and can function as both an essence and a serum. For more on snail mucin, check out [/snail-mucin-everything-you-need-to-know/].
Step 5: Moisturizer
WHY it matters for Glass Skin: The moisturizer is the crucial final step in your hydration sandwich, acting as an occlusive layer to seal in all the hydrating goodness from the previous steps. It strengthens the skin barrier, prevents transepidermal water loss (TEWL), and provides a protective layer against environmental aggressors, ensuring your skin remains plump, supple, and radiant throughout the day or night.
Product Types to Look For: The ideal moisturizer for glass skin is:
- Hydrating without being heavy or mattifying: You want a formula that provides ample moisture without feeling greasy or dulling your glow.
- Barrier-supporting: Look for ingredients that mimic the skin’s natural lipid barrier.
- Appropriate for your skin type:
- Oily/Combination Skin: Lightweight gel creams or lotions that provide hydration without excess oil.
- Normal/Dry Skin: Richer creams with emollients and occlusives to provide lasting moisture and barrier support.
Key Ingredients:
- Ceramides: Essential lipids that make up a significant portion of your skin barrier, crucial for moisture retention and protection.
- Fatty Acids & Cholesterol: Other vital components of the skin barrier, working in synergy with ceramides.
- Glycerin, Hyaluronic Acid: Additional humectants to draw and hold moisture.
- Squalane, Jojoba Oil: Emollients that soften and smooth skin.
- Shea Butter, Petrolatum (in heavier creams): Occlusives that create a physical barrier to prevent water loss.
How to Apply Moisturizer: Apply a generous, even layer of moisturizer to your face and neck, gently massaging it in until absorbed. In the morning, this is the last step before SPF. In the evening, it’s your final step.
Product Recommendations: Look for K-beauty moisturizers known for their elegant textures and barrier-supporting ingredients. Examples include the Illiyoon Ceramide Ato Concentrate Cream (a cult favorite for barrier repair), or lighter gel-creams like the Laneige Water Bank Blue Hyaluronic Cream for oily/combo skin.
Step 6: SPF (Morning Routine Only)
WHY it matters for Glass Skin: This step is non-negotiable and arguably the most critical for achieving and maintaining glass skin. UV radiation is the leading cause of premature aging, hyperpigmentation (sun spots, melasma), collagen breakdown, and dullness. Without daily, consistent sun protection, all your efforts towards achieving an even-toned, translucent, and youthful complexion will be undermined. SPF protects your skin’s health, prevents future damage, and preserves the luminosity you’ve worked so hard to cultivate.
Product Types to Look For:
- Broad-Spectrum: Protects against both UVA (aging rays) and UVB (burning rays).
- SPF 30 or Higher: Minimum recommendation for daily use.
- Lightweight, Non-Greasy Formulas: K-beauty sunscreens are renowned for their elegant textures that absorb quickly without leaving a white cast or greasy residue, making them perfect for layering in a glass skin routine.
- Mineral (Physical) vs. Chemical:
- Mineral (Zinc Oxide, Titanium Dioxide): Sit on top of the skin to block UV rays. Good for sensitive skin, but can sometimes leave a white cast.
- Chemical (Avobenzone, Octinoxate, etc.): Absorb UV rays and convert them into heat. Tend to be more cosmetically elegant.
How to Apply SPF:
- Last Step: Apply as the absolute final step in your morning skincare routine, after your moisturizer.
- Generous Amount: Use a sufficient amount – about two finger-lengths for your face and neck.
- Reapplication: Reapply every two hours when exposed to direct sunlight, or after sweating or swimming.
Product Recommendations: K-beauty offers a plethora of fantastic SPFs. Look for options like Beauty of Joseon Relief Sun: Rice + Probiotics or Round Lab Birch Juice Moisturizing Sun Cream, both praised for their non-greasy, hydrating, and invisible finishes.
Step 7: Weekly Sheet Mask / Sleeping Mask
WHY it matters for Glass Skin: These are your intensive booster treatments, providing an extra dose of hydration and targeted ingredients to accelerate your glass skin journey. They offer a moment of self-care and relaxation while delivering concentrated benefits.
Product Types to Look For:
- Sheet Masks:
- What it does: Delivers a concentrated serum or essence to the skin in a sealed environment, allowing for deeper penetration and a temporary plumping effect.
- Key Ingredients: Hyaluronic acid, ceramides, centella asiatica, peptides, vitamins, soothing plant extracts.
- How to use: Apply to a clean, toned face for 15-20 minutes. Pat in remaining essence.
- Sleeping Masks (Sleeping Packs):
- What it does: A thicker, often gel-like or cream-like mask applied as the last step of your evening routine, designed to work overnight. It forms an occlusive layer that seals in moisture and active ingredients, preventing TEWL and delivering intense nourishment.
- Key Ingredients: Humectants, emollients, occlusives, antioxidants, soothing agents.
- How to use: Apply a thin, even layer as the final step in your evening routine, 2-3 times a week, in place of your regular moisturizer or on top of it for an extra boost. Rinse off in the morning.
How to Incorporate: Use either a sheet mask or a sleeping mask 1-3 times a week, depending on your skin’s needs and your routine. They are excellent for boosting hydration, calming irritation, and waking up to a visibly plumper, more radiant complexion.
The 7-Skin Method Explained
The “7-Skin Method” is a cornerstone of the glass skin routine, originating from Korea, and it’s a game-changer for achieving profound hydration. It’s not about using 7 different products, but rather applying 7 thin layers of the same hydrating toner or essence.
What It Is: The “skin” in 7-Skin refers to “toner” in Korean skincare terminology. The method involves repeatedly applying a lightweight, hydrating toner or essence to the face. Instead of swiping with a cotton pad, which can be wasteful and slightly abrasive, the product is gently patted into the skin using the warmth of your hands. Each layer is allowed to partially absorb before the next is applied, building up a deep reservoir of moisture within the skin.
Why It Works for Glass Skin:
- Deep Hydration: Instead of a single, superficial application, layering ensures that the skin receives multiple doses of humectants and hydrating ingredients, saturating the stratum corneum. This plumps up skin cells, making the skin appear smoother, more translucent, and reducing the visibility of fine lines and pores.
- Improved Absorption: Applying thin layers allows for better absorption than a single thick layer, which might just sit on the surface. The skin is gradually primed to accept and retain moisture.
- Enhanced Barrier Function: By consistently saturating the skin with hydration, the 7-Skin Method supports a healthy skin barrier, preventing transepidermal water loss and making the skin more resilient.
- “Chok Chok” Bounce: The cumulative hydration directly contributes to the desired “chok chok” (bouncy, dewy) quality of glass skin.
How to Do the 7-Skin Method:
- Choose Your Product: Select a lightweight, alcohol-free, hydrating toner or essence. Look for ingredients like hyaluronic acid, glycerin, panthenol, centella asiatica, or beta-glucan. Avoid anything with astringent properties, strong fragrances, or harsh actives.
- Cleanse First: Perform your double cleanse as usual. Your skin should be clean and slightly damp.
- First Layer: Dispense a coin-sized amount of toner into your clean palms. Gently pat and press it onto your face, neck, and décolletage until it feels mostly absorbed (about 10-15 seconds).
- Repeat: Repeat step 3, applying another thin layer. Continue this process for 3 to 7 layers, or until your skin feels thoroughly saturated, plump, and dewy. You don’t necessarily have to do all 7 layers every time; listen to your skin. Some days 3 layers might be enough, other days you might crave more.
- Observe: Your skin should feel incredibly hydrated, supple, and slightly tacky, but not greasy. It should have a visible plumpness and a healthy glow.
- Continue Routine: Once your final layer is absorbed, proceed with your essence (if using a separate one), serum, and moisturizer.
Tips for Success:
- Listen to Your Skin: Not everyone needs 7 layers every day. Start with 3-4 layers and adjust based on your skin’s needs and the climate.
- Product Choice is Key: The success of this method hinges on using a truly hydrating, non-irritating product.
- Don’t Rush: Allow each layer a moment to absorb. This isn’t a race.
- Morning & Night: You can incorporate the 7-Skin method into both your morning and evening routines for maximum benefit.
Best Ingredients for Glass Skin
Achieving glass skin isn’t just about the steps; it’s about the ingredients you choose. These powerhouses work synergistically to hydrate, repair, brighten, and smooth your complexion.
-
Hyaluronic Acid (HA):
- Why it’s essential: The ultimate humectant, HA can hold up to 1,000 times its weight in water. It draws moisture from the environment and deeper skin layers to the surface, instantly plumping the skin, reducing the appearance of fine lines, and creating that dewy, hydrated look. Multi-molecular weight HA ensures hydration at different depths.
- Find it in: Toners, essences, serums, moisturizers.
- Learn more: Dive deeper into [/the-truth-about-hyaluronic-acid/].
-
Niacinamide (Vitamin B3):
- Why it’s essential: A true multitasker for glass skin. Niacinamide strengthens the skin barrier, minimizes the appearance of enlarged pores, reduces redness and inflammation, brightens uneven skin tone, and helps regulate oil production. All these benefits contribute to a smoother, clearer, more even, and luminous complexion.
- Find it in: Serums, essences, moisturizers.
-
Snail Mucin (Snail Secretion Filtrate):
- Why it’s essential: A K-beauty superstar, snail mucin is rich in hyaluronic acid, glycoproteins, proteoglycans, and antioxidants. It’s incredibly hydrating, promotes skin repair and regeneration, improves elasticity, soothes irritation, and can help fade hyperpigmentation, leading to a smoother, more radiant, and resilient complexion.
- Find it in: Essences, serums, creams.
- Learn more: Explore [/snail-mucin-everything-you-need-to-know/].
-
Centella Asiatica (Cica):
- Why it’s essential: Known for its powerful soothing, healing, and anti-inflammatory properties. Cica helps calm irritated skin, reduces redness, accelerates wound healing, and strengthens the skin barrier. A healthy, calm barrier is fundamental for translucent, even-toned glass skin.
- Find it in: Toners, essences, serums, moisturizers, masks.
-
Ceramides:
- Why it’s essential: These are lipids that make up a significant portion of your skin’s natural barrier. Ceramides are crucial for maintaining barrier integrity, preventing moisture loss, and protecting the skin from environmental damage. Replenishing ceramides leads to stronger, healthier, and more resilient skin that retains hydration better.
- Find it in: Moisturizers, serums.
-
Glycerin:
- Why it’s essential: A classic, highly effective humectant that draws moisture into the skin. It’s found in almost all hydrating products and works synergistically with other humectants to keep skin plump and dewy.
- Find it in: Cleansers, toners, essences, serums, moisturizers.
-
Peptides:
- Why it’s essential: Short chains of amino acids that act as building blocks for proteins like collagen and elastin. Peptides signal the skin to produce more of these proteins, improving firmness, elasticity, and reducing the appearance of fine lines, contributing to the “bouncy” quality of glass skin.
- Find it in: Serums, moisturizers.
-
Gentle AHAs/BHAs/PHAs:
- Why it’s essential: While glass skin is about gentleness, controlled exfoliation is key for smoothness. Low concentrations of AHAs (lactic acid for surface smoothness), BHAs (salicylic acid for pore clarity), or PHAs (gluconolactone for sensitive skin) remove dead skin cells without irritation, allowing light to reflect evenly and products to penetrate better.
- Find it in: Exfoliating toners, serums (used 1-2x weekly).
Common Mistakes on the Glass Skin Journey
While the glass skin routine is highly effective, it’s easy to fall into common traps that can hinder your progress or even damage your skin. Avoiding these mistakes is just as important as following the steps correctly.
-
Over-Exfoliating:
- The Mistake: Using harsh physical scrubs, exfoliating too frequently (daily chemical exfoliants), or combining too many exfoliating acids.
- The Impact: Damages the skin barrier, leading to redness, irritation, increased sensitivity, dryness, and even breakouts. Instead of smooth, luminous skin, you’ll end up with a compromised, inflamed complexion that scatters light and looks dull.
- The Fix: Limit chemical exfoliation to 1-2 times per week with a gentle, low-concentration product. Listen to your skin; if it feels sensitive, reduce frequency.
-
Skipping SPF:
- The Mistake: Believing SPF is only for beach days, or skipping it on cloudy days or when indoors.
- The Impact: UV radiation is the primary cause of hyperpigmentation (sun spots, melasma), collagen degradation, fine lines, and overall dullness. It undoes all your efforts to achieve an even, translucent, and youthful complexion.
- The Fix: Make broad-spectrum SPF 30+ your non-negotiable final step every single morning, 365 days a year, regardless of weather or indoor/outdoor activity. Reapply as needed.
-
Using Too Many Actives (or the Wrong Combination):
- The Mistake: Loading up on multiple strong active ingredients (e.g., high-percentage Vitamin C, Retinoids, and strong AHAs) all at once, or layering incompatible actives.
- The Impact: Can overwhelm and irritate the skin, leading to redness, flakiness, increased sensitivity, and a damaged barrier. Glass skin is about gentle nourishment.
- The Fix: Introduce new actives one at a time. Focus on one or two targeted serums. If using strong actives (like retinoids), integrate them slowly and carefully, ensuring your barrier is robust, and avoid using them on exfoliation nights. Prioritize hydration and barrier repair.
-
Not Patch Testing New Products:
- The Mistake: Applying a new product directly to your entire face without checking for a reaction.
- The Impact: Potential for allergic reactions, irritation, or breakouts, which can set back your glass skin progress significantly.
- The Fix: Always patch test new products on a small, inconspicuous area (like behind your ear or on your inner arm) for 24-48 hours before applying to your entire face.
-
Inconsistency:
- The Mistake: Following the routine sporadically, skipping steps, or changing products too frequently.
- The Impact: Skincare is a marathon, not a sprint. Results are cumulative. Inconsistency means your skin never gets the chance to fully adapt and benefit from the routine.
- The Fix: Stick to a consistent morning and evening routine. Give products at least 4-6 weeks to show results before deciding if they work for you.
-
Using Stripping Cleansers:
- The Mistake: Choosing cleansers that leave your skin feeling “squeaky clean” or tight after washing.
- The Impact: These cleansers disrupt the skin’s natural pH and strip away essential lipids, damaging the skin barrier from the very first step of your routine. This leads to dryness, irritation, and makes it harder for your skin to retain moisture.
- The Fix: Opt for gentle, low-pH, hydrating cleansers that leave your skin feeling soft and comfortable, not stripped.
-
Expecting Instant Results:
- The Mistake: Believing glass skin can be achieved overnight or within a few days.
- The Impact: Leads to frustration and often causes people to abandon the routine prematurely or resort to harsh measures.
- The Fix: Understand that true skin transformation takes time. Be patient, consistent, and celebrate small improvements along the way.
By being mindful of these common pitfalls, you can navigate your glass skin journey more effectively and safely, ensuring you achieve the radiant, healthy complexion you desire.
How Long Until You See Glass Skin? A Realistic Timeline
The desire for instant gratification is strong, especially with aspirational skin goals like glass skin. However, it’s crucial to set realistic expectations. True skin transformation, particularly one focused on deep hydration and barrier health, takes time and consistent effort.
The Realistic Timeline:
-
Initial Improvements (1-2 Weeks):
- You’ll likely notice your skin feeling more hydrated and softer almost immediately, especially if you were previously dehydrated.
- A slight increase in luminosity might be visible as your skin barrier begins to repair and retain moisture more effectively.
- Any tightness or dryness you experienced will significantly reduce.
-
Noticeable Changes (4-6 Weeks):
- This is typically when you’ll start to see more visible improvements in skin texture and tone.
- Pores may appear less prominent due to increased hydration and gentle exfoliation.
- Redness and minor irritations should start to subside, contributing to a more even complexion.
- The “chok chok” bounciness and plumpness will become more apparent.
- Overall, your skin will look healthier and have a more consistent glow.
-
Significant Transformation (8-12 Weeks and Beyond):
- By this point, with consistent adherence to the routine, your skin should show marked signs of glass skin.
- Clarity and translucency will be significantly improved.
- Hyperpigmentation (if addressed with appropriate ingredients) will have faded considerably.
- Your skin barrier will be stronger and more resilient.
- The even reflection of light will be much more noticeable, giving you that distinct glass-like sheen.
- This is when others might start commenting on your radiant complexion.
Factors Influencing Your Timeline:
- Current Skin Condition: If your skin is severely dehydrated, compromised, or dealing with significant concerns (e.g., active acne, severe hyperpigmentation), it will naturally take longer to see dramatic results.
- Consistency: Adhering to the routine every single day, morning and night, is paramount. Skipping steps or days will prolong the process.
- Product Choice: Using high-quality, barrier-supporting, and hydrating products with effective ingredients will yield faster and better results than ineffective or irritating ones.
- Genetics and Lifestyle: Individual skin regeneration cycles, genetics, diet, stress levels, and environmental factors (e.g., pollution, climate) can all play a role.
- Patience is Key: The journey to glass skin is about nurturing your skin to its optimal health. It’s a gradual process of building up hydration, strengthening the barrier, and promoting cell turnover. Don’t get discouraged if you don’t see overnight miracles. Celebrate the small improvements and trust the process.
Think of it as cultivating a garden: you can’t plant seeds and expect a lush bloom tomorrow. You need to water consistently, provide nutrients, protect it from pests, and give it time to grow. Your skin is the same. With dedication, your efforts will undoubtedly blossom into a healthier, more luminous, and truly glassy complexion.
Frequently Asked Questions About Glass Skin
How do I get glass skin?
Getting glass skin involves a consistent, multi-step Korean skincare routine focused on deep hydration, gentle exfoliation, and strengthening the skin barrier. The core steps include double cleansing, gentle chemical exfoliation (1-2x/week), layering hydrating toners and essences (like the 7-Skin Method), applying targeted serums (e.g., hyaluronic acid, niacinamide, snail mucin), locking it all in with a moisturizer, and finishing with daily broad-spectrum SPF. Weekly sheet masks or sleeping masks provide an extra boost.
Can you get glass skin with large pores?
Yes, you absolutely can achieve the appearance of glass skin even if you naturally have larger pores. While you cannot physically shrink your pore size (which is genetically determined), a glass skin routine significantly minimizes their visibility. Deep hydration plumps the skin around the pores, making them appear smaller and less noticeable. Gentle exfoliation keeps them clear of debris, and ingredients like niacinamide can help refine their look. The goal is smooth, clear, light-reflecting skin, where pores become much less apparent.
What products do I need for glass skin?
You don’t need dozens of products, but rather key categories with effective ingredients: *
Can I maintain a glass skin routine while traveling?
Absolutely — a pared-down 4-5 product kit maintains the core hydration and protection. Our Korean skincare travel kit guide covers which multi-taskers to pack and how to maintain your glass skin routine with only carry-on space.